Easy Way to Remove Lathe From Rough Lumber

A very common question is where do I find wood for turning. The next challenge is, once you have collected some wood, boards, or branches, how do you get the rough wood onto your lathe? The key to successful woodturning is preparing the wood to turn, then securing that wood on the lathe so that you can shape it with your tools and not have the wood fly off the lathe. If you are going to turn wood then eventually, at some point, the wood will fly off the lathe. Let's see what we can do to prevent that from happening.
Local wood for turning Part II
Part I of this series is on finding local wood for turning. Once you start seeing turning wood it will "turn" up everywhere!
5 steps to prepare rough wood for turning
Now you've collected a bundle of wood. Most of it looks good otherwise you wouldn't have brought it home! A bowl from this stump, and a spindle or two from a branch, how do I take all of these odd shapes and drop them on the lathe?
1. Hazard removal from rough wood
Ensure that there are no hazards in the wood. Examine the wood for indications of metal or hardware being embedded in the wood. A handheld metal detector or a rare earth magnet on a string can find some metal hidden under the bark. Are there unexpected bumps or growths where the tree grew over a nail or wire wrapped around the tree? Was the wood found in the forest where it would be less likely to be damaged or was it in the city, especially a tree on a lot owned by an active family? Think of tree forts and clotheslines. Is the piece of wood from the root area? Was the wood dropped on rocky ground? Check for rocks and dirt, both can dull a chainsaw very quickly. Remove all hazards that you can see before you start to cut.
2. Rough cuts
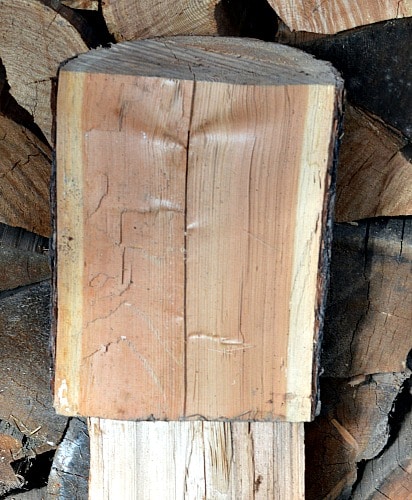
When you do cut rough wood, cut slowly so you can stop if you see sparks starting to fly! Always cut your blanks oversize. It makes the pieces easier and safer to control. Use cradles or other pieces of wood to keep a log steady if you are using a chainsaw to cut out bowl blanks or to trim to size. To cut a round in half use the chainsaw along the length of the round, parallel with the grain, rather than across the top. When you are about an inch from the ground then stand the round-up and cut out the last bit. This will be a lot easier and less wearing on your saw.
Cut or split your rounds in half as soon as possible. This will let the wood move as it dries and greatly reduces the chance of splitting your wood.
3. Jigs for trimming
Build jigs that you can use to hold a log steady as you flatten one side of it. I built a cradle for use in my planner. I screw the wood to the jig so that the log doesn't turn as it goes through the planner. Once I have one good flat surface I can use a band saw to cut out bowl blanks or the table saw to produce billets for spindle turning. You can use a crosscut sled with clamps, on your table saw to trim rough wood. Keep your fingers away from the cutting action of your power tools.
4. Sealing the wood
If you are planning on drying the wood then you should cover the ends of the wood with paint, wax, or a wood sealer. Green wood can split very quickly as every spot you cut the wood is a place that it can now lose moisture.
5. Rough turning bowls and spindles
You can turn green bowls to a rough state. The thickness of the bowl should be 10 percent of the diameter of the bowl. That is 1″ in thickness for a 10" bowl. The shape will change but not enough to put the blank so far out of round that you can't turn a bowl from it.
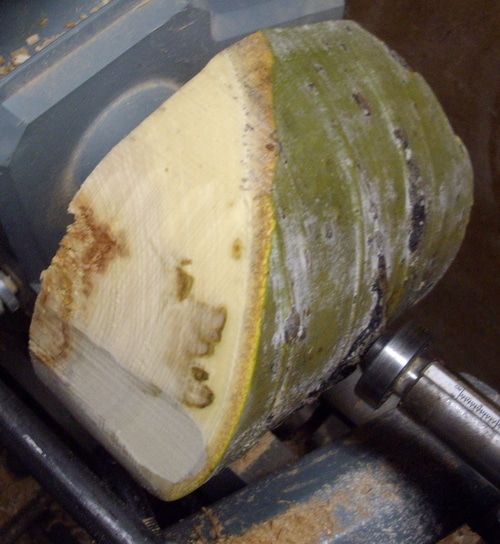
Attach your bowl blank to a faceplate and mount it on the lathe. Be sure to pull your tailstock up to support the blank. A rough bowl blank is out of balance and the tailstock gives the needed extra support.
When you turn on your lathe use a slow speed and stand clear of the firing zone. The firing zone is at right angles to the lathe where the bowl blank is. This is the direction the wood would go if it flew off of the lathe.
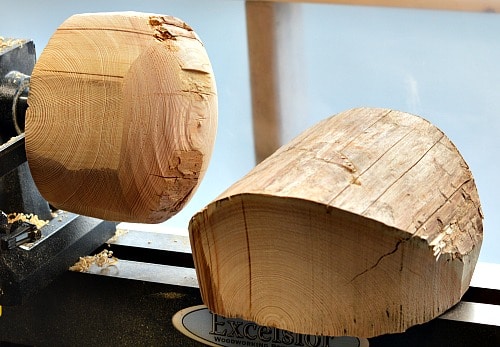
Selecting a faceplate

You want to match the size of your faceplate to the size of your turning blank. Small blanks, like those shown above and below, can be attached with a 3″ faceplate. Most lathes come with a faceplate this size. You can also pick up a 3″ diameter faceplate from amazon. (Make sure it will fit on the arbor of your lathe. My lathe has a 1″ arbor with 8 tpi.)
Try to attach the faceplate on a flat surface if possible. Also, align the screws off of the direction of the grain so that two screws don't end up splitting the wood along the grain. You don't need super long wood screws just make sure they enter the wood beyond the bark.
Go slow in shaping the outside of the bowl since you will be initially cutting a lot of air. Once you have rough turned the bowl then let the bowl dry for a few months.
While drying the rough turned bowl, cover the bowl with brown paper, over the outside of the bowl, taping it closed over the opening. This will hold the moisture in and prevent the bowl from drying out too quickly, preventing cracking. When using local, green wood for turning you might have a dedicated shelf in your workshop of bowls in various stages of drying, so it helps to label the paper with the kind of wood and the date, just so you don't forget.
Moving on with your rough wood
After drying the rough turned bowl slowly in your shop you are ready to finish it on the lathe. Place the dried blank on a faceplate and turn the bowl to a finished shape and it will now stay round. You can also finish a green bowl to a thinner-walled bowl and then enjoy the natural warping that takes place as it dries. Consistency in the thickness of the bowl is what allows the wood to change shape and not split. This can look really neat if you don't mind bowls that are not round.
For spindle billets you should let the wood dry out if you need to maintain the circular shape of the spindle, that is if you are fitting the piece into a drilled hole. However, if you are going to finish the piece then the finish you use would allow the work to dry slowly over time. Most spindle turnings are quite small and finishing with carnauba wax provides enough of a sealant to eliminate the dangers of cracking or splitting as the item dries. Of course, you could wax the ends and wait awhile before turning with the wood if you thought it was still too wet.
Other posts using rough wood.
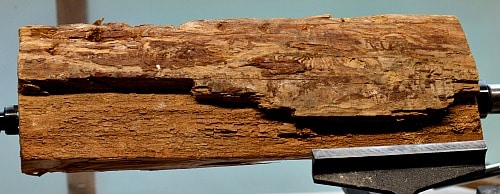
I turned a Kraut Pounder out of the piece of firewood above. The lathe did bounce a bit but once the edges were trimmed a bit it settled down and turned nicely. Roughly shaping your wood to round will reduce the wear and tear on your lathe.
The piece of firewood that I turned for my brother's cremation urn was huge. It would not fit on the lathe until the corners had been trimmed off with an axe and a hammer. That was a piece of really rough wood. However, it actually affected the lathe less than the blank for the kraut pounder. Keep checking the driveshaft and the tailstock to ensure that your wood is always securely attached to the lathe.
So head out to your stash of wood and get some wood ready for turning. What piece of wood has you excited about turning? What challenges have you faced in preparing your wood?

Turning For Profit
If you have any questions about preparing rough wood, actually turning, or the business of turning, please leave me a comment at the bottom of the page.
These posts are for you, the woodturner. If you like turning projects or articles related to the business of turning then please sign up for the Turning For Profit newsletter. Generally, it comes out once a week and has links to the current articles, a bit on what I am up to, and usually a question for your response. You can sign up on the right sidebar or just a little lower on the page.
I love woodturning and sharing with you. You can follow me on Facebook as well. Thank you for allowing me to join you on your woodturning journey. Have fun and remember to turn safely.
Save
Save
Save
Save
Source: https://www.turningforprofit.com/5-steps-to-prepare-rough-wood-for-turning/
Post a Comment for "Easy Way to Remove Lathe From Rough Lumber"